HostGator has partnered with SiteLock to provide internet security services with their hosting plans, which also includes their global TrueSpeed CDN.
In this guide, I’ll explain how HostGator CDN works & how to get it free.
While you could use third-party CDNs like BunnyCDN, SiteLock’s TrueSpeed CDN (Content Delivery Network) is the only one that is officially supported.
SiteLock & TrueSpeed CDN
SiteLock is most known for it’s high-end website security services, which includes a firewall to protect from hackers as well as scanning, and removal of malware and other threats that can infect your website, namely for WordPress.
And, when I say high-end, I’m talking about a service that would normally cost you $199,9/year at a minimum, which HostGator provides for either completely free or for a much more reasonable price as an add-on starting at $1.67/month.
And while less advertised, it also includes a global TrueSpeed CDN service, which distributes your website blazing fast to most corners of the world.
The CDN consists of a server network of so called PoPs in 22 countries;
Canada, Greece, Netherlands, Germany, Hong Kong (China), Portugal, United Kingdom (UK), Poland, New Zealand, Sweden, Israel, Austria, Spain, Italy, Singapore, France, Japan, Brazil, Australia, Russia, United States (US) & Switzerland.
HostGator CDN Free VS Paid
There are a few options, to obtain TrueSpeed CDN for your website;
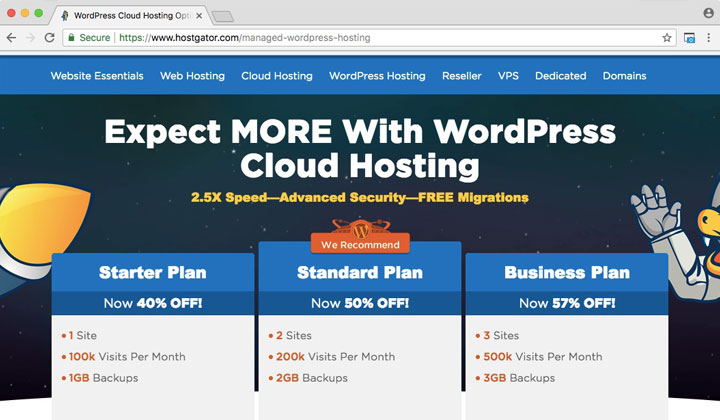
Currently the only way to get HostGator CDN for completely free, you will need to signup for the optimized “WordPress Cloud Hosting” plan.
It’s included free in Starter, Standard and Business. But wait, there’s more!
Still the cheapest way to obtain HostGator hosting with a CDN is by purchasing a basic “Shared Web Hosting“, namely the Hatcling or Baby plan.
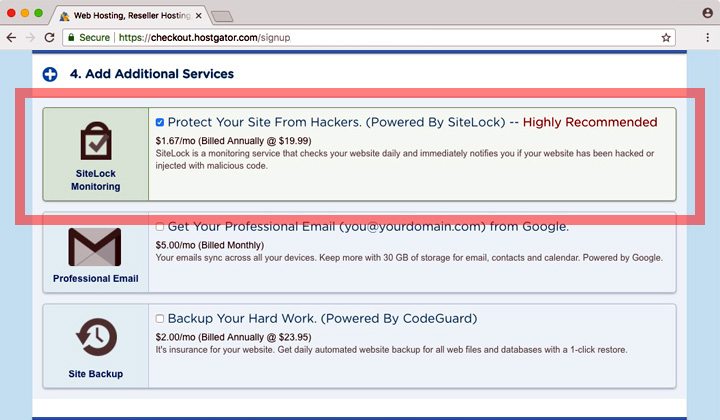
During signup you can include SiteLock as an add-on for $1.67/month. It will be cheaper compared to the cost of Managed WordPress, even though it’s included for free. Select “SiteLock Monitoring” under additional services (see above).
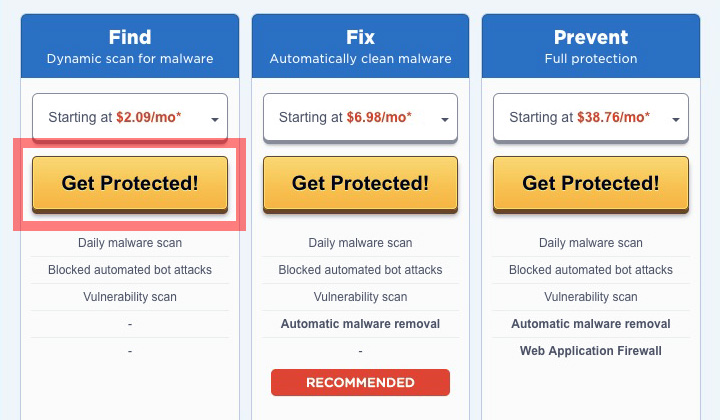
Then the third option is to purchase the SiteLock add-on after you have signed up, and this will cost you slightly more, starting at $2.09/month.
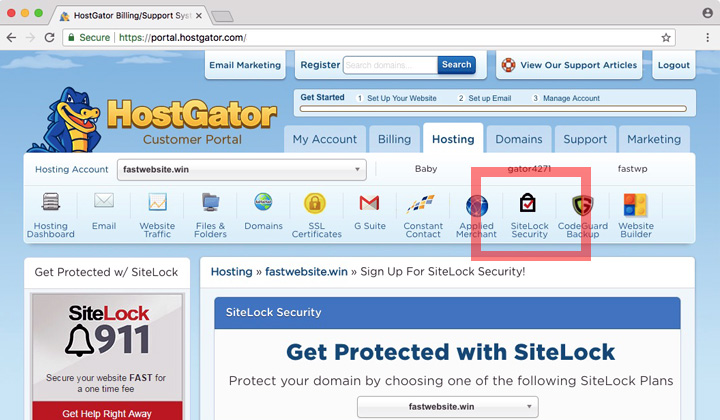
In Customer Portal, under “Hosting” and “SiteLock Security” you will see three plans to choose from. Find, Fix or Prevent depending on if you want to include malware removal or not. However, all plans include the global TrueSpeed CDN.
If you purchased SiteLock during signup, or you are on WordPress Cloud Hosting, this will be the basic “Find” plan, which you can upgrade later if you like.
Setting up HostGator CDN
Now that you have SiteLock in your hands, I’ll show you the exact steps to enabling the service. And remember, HostGator live support is your friend if you get stuck.
You can also follow official instructions over here.
In your Customer Portal (login instructions will be in your mail box), you first need to navigate to the “SiteLock Security” settings under “Hosting”.
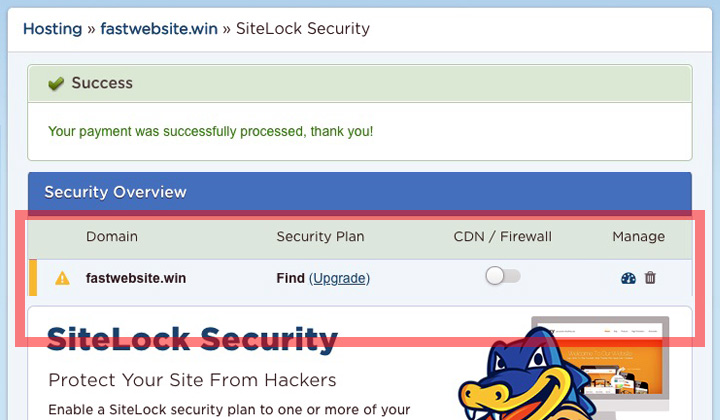
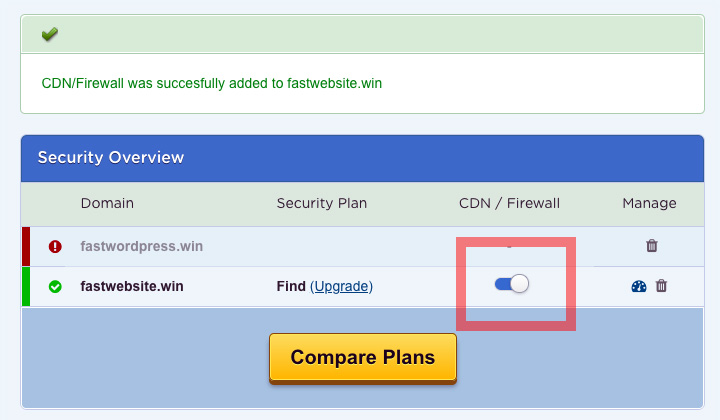
This is also where you can later purchase the SiteLock add-on if you wish. Once you’re ready, you’ll see your domain under “Security Overview” like shown above.
Go to the SiteLock website to start setting up the CDN by clicking the “dashboard icon” under “Manage” on the right side of your website.
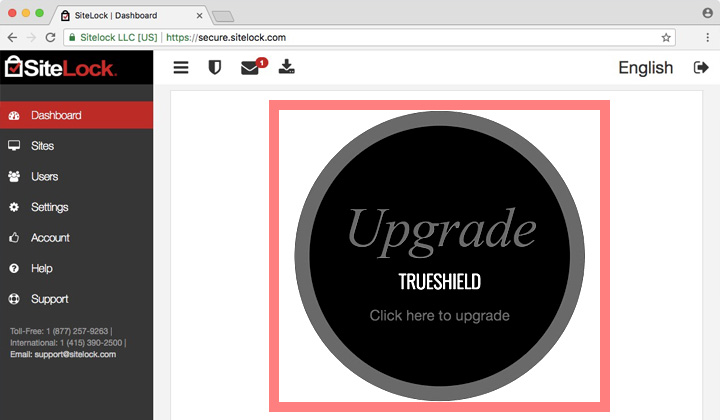
This is what the SiteLock.com dashboard looks like. Just scroll to the bottom of the page, until you see a circle that says “TrueShield”. Click on that.
Please note! If you are on WordPress Cloud Hosting, skip this step.
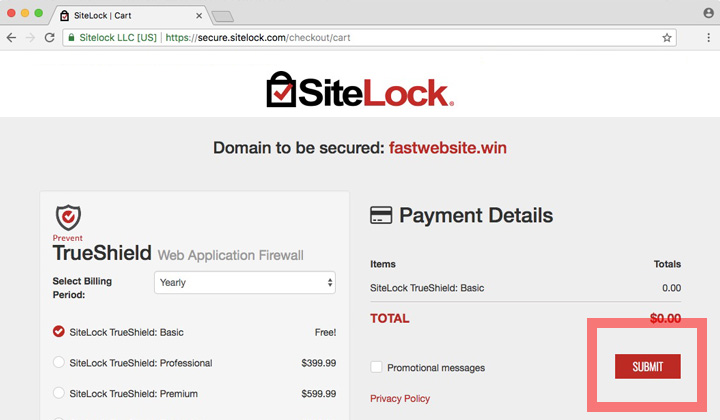
This will take you to the page to upgrade to “SiteLock TrueShield Basic”. Simply click on “Submit” to complete the purchase, which is totally free.
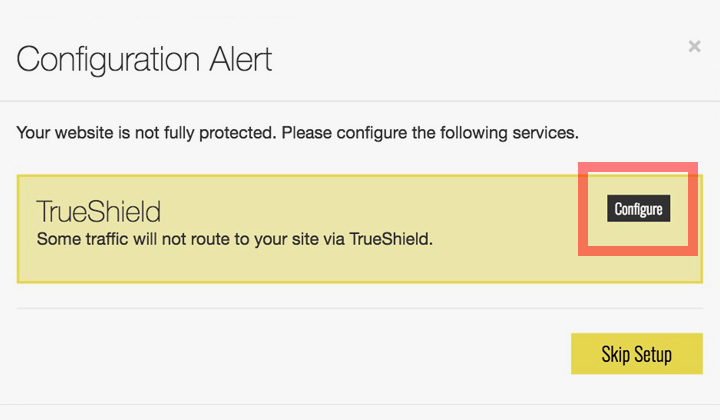
Next, proceed to “Configure” the TrueShield and TrueSpeed CDN.
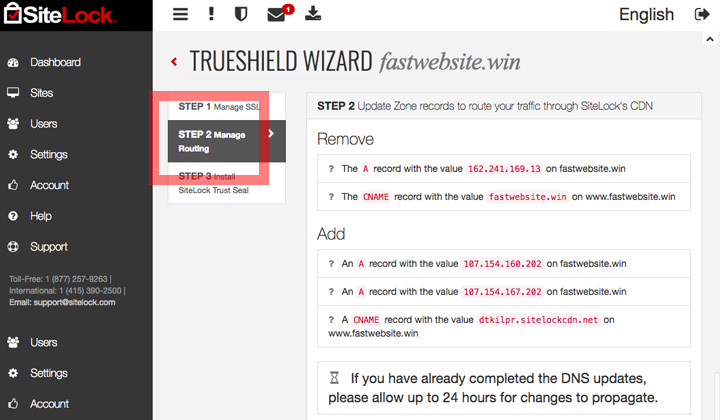
You are now in the “TrueShield Wizard” which provides the zone records needed to route your traffic through SiteLock’s CDN.
Take note of these three records under “Add” section;
- First A record (example; 107.154.160.202)
- Second A record (example; 107.154.167.202)
- CNAME record (example; dtkilpr.sitelockcdn.net)
These records vary individually. So please, take down the ones that are specifically supplied for your website, under “Manage Routing”.
You can contact HostGator Support and ask them to setup these records for you, or you can go through the manual steps below. Those on HostGator Cloud Hosting, you will have to contact support as there is no hosting control panel.
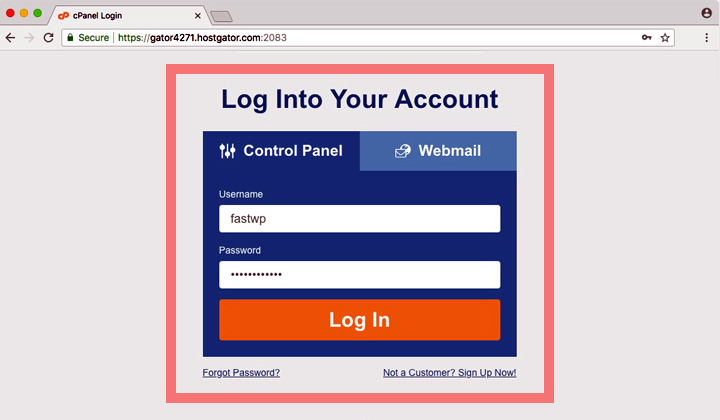
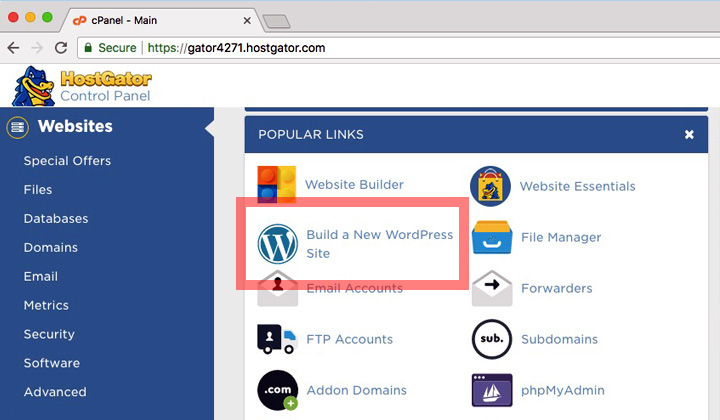
Then login to “cPanel”, the hosting control panel used by HostGator. Check email for your personal login URL and username, password credentials.
Remember, that these manual steps are available for shared web hosting only.
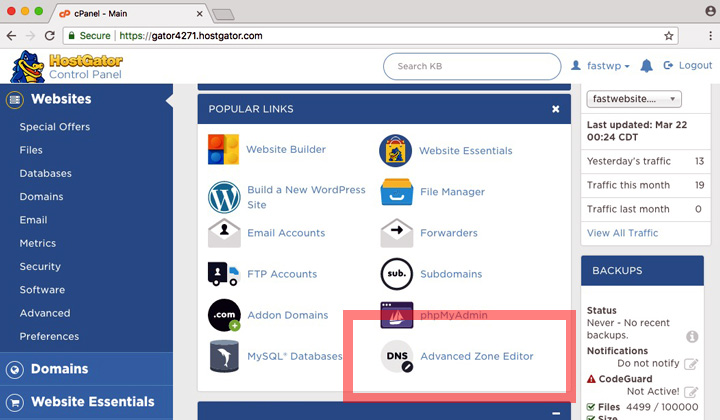
To edit records, open “Advanced Zone Editor” in your control panel.
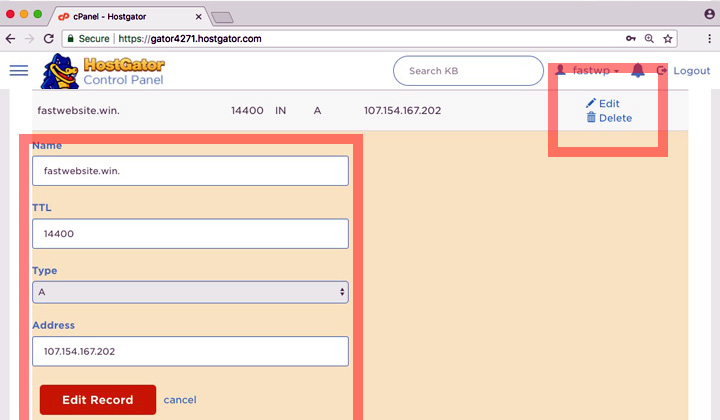
The first A record must be edited. Find the line with your domain, and “A” as record type, then click on the “Edit” button. Save changes with “Edit Record” button.
- Name: mywebsite.com
- TTL: 14400
- Type: A
- Address: Example; 107.154.160.202
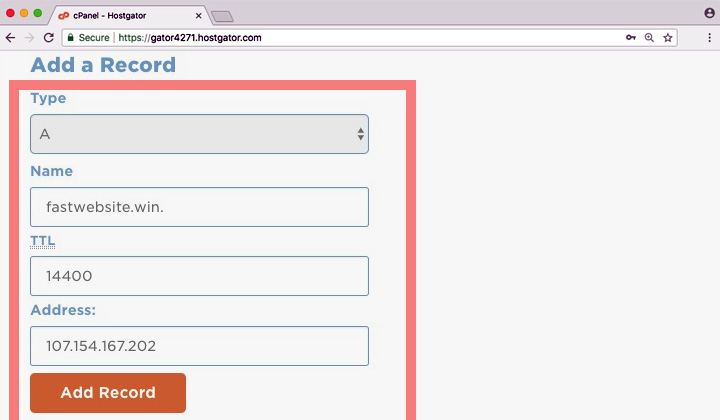
The second A record is added. At the top, under “Add a Record”, fill in the following details. And save changes with “Add Record” button.
- Type: A
- Name: mywebsite.com
- TTL: 14400
- Address: Example; 107.154.167.202
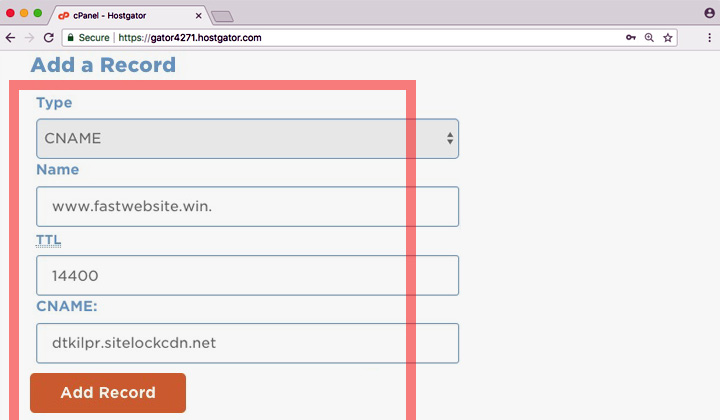
Then the CNAME record is added in the same way.
- Type: CNAME
- Name: mywebsite.com
- TTL: 14400
- Address: Example; dtkilpr.sitelockcdn.net
Once the records are set up to route your traffic through SiteLock’s CDN, you are ready to go back to the Customer Portal. Flip the switch to enable the CDN!
You can now start building your site, or you can migrate (transfer) your old site for free with the assistance of HostGator’s support team.
Over time, your site contents will be cached throughout the TrueSpeed CDN server network. The website speed increase will be gradual (during the day). According to SiteLock, page load times increase more than 50% on average.
Any questions about this process? Just leave me a comment below!
HostGator CDN with HTTPS
If you want to host your website with a SSL certificate under HTTPS, and use CDN at the same time.. unfortunately the basic SiteLock plan does not support this.
You would need to upgrade to the “SiteLock Prevent Plan”, which includes the Premium version of TrueShield. This will fully support any SSL certificate.
Click here to see the pricing of all SiteLock plans.
However, this is likely too expensive for most users. And in fact, I would recommend other options to get both the CDN and SSL certificate for free.
For example — Bluehost hosting is the same company as HostGator. The websites are hosted on the same quality data center, the price of hosting plans is the same, and even the quality support team is the exact same. Just like home.
Yet, they support free Cloudflare CDN with SSL!
See here for instructions on setting up free CDN with Bluehost.
Prefer to stay with HostGator?
I highly recommend checking out the services of BunnyCDN for an affordable, third-party global content delivery network, that’s friendly & easy to use.
And that’s all there is to free & paid global CDN hosting with HostGator.
Leave your comments below and I’ll get back to you!
Need more speed for your WordPress site, for free?
Click here for HostGator’s recommended plugins to boost performance.
It’s also worth noting, that sometimes these posts contain affiliate links. There’s no extra cost to visitors, and it keeps me working hard on my blog. The support is also completely voluntary, for which I am super grateful. Thank you for reading! Saludos, Tim.
