In this guide, I’ll review Singapore hosting solutions from HostGator. Explain how to get blazing fast speeds and change to the language of your choice, Mandarin Chinese, Malay Indonesian, etc. With easy, step-by-step instructions!

Useful links to get started:
- HostGator server speed test for Singapore
- Changing hosting language to Chinese, Indonesian, etc
- List of awards won by HostGator
HostGator Singapore Review
The web hosting services of HostGator are not just popular amongst US customers, they server a whole global range of users including those from Singapore, or those looking for fast hosting to various parts of the Asian continent.
While Singapore is well connected and home to some of the world’s most advanced data centers, the hosting companies there are not always in level with their modern counterparts. Thus, the attraction to go with a known US company.
Even if Asia or Singapore targeted, still most regular websites run perfectly fine through HostGator’s data center in the US. It’s connected to multiple internet providers, for a stable connection to Asia and other parts of the world.
Also in my experience it’s a better route for hosting to Chinese mainland.
For those considering if to host in Singapore or not, HostGator offers improvement with a CDN service (read more about their, Content Delivery Network).
With it your website is hosted on a global network of data centers, optimizing speeds throughout the world. Including servers in Singapore, Hong Kong, Japan, etc.
HostGator Singapore Web Hosting;
- Host through their central US data center for good global performance
- Get blazing fast speeds in Singapore & elsewhere with CDN optimization
Without a doubt HostGator can deliver to even the most demanding of customers interested in the Singapore country location. But needs are different.
Take a Singapore speed test with HostGator here.
If you decide that taking the most out of speeds is for you, read the rest of the review for a simple guided tour of how to get your site CDN ready.
Singapore Optimization with CDN
HostGator has joined with SiteLock to offer a web security & CDN package. You get access to their global delivery network spanning through 22 countries.
Most CDNs have expensive yearly minimum fees, intended for high-traffic sites. With HostGator you either get it for free with their WordPress hosting plan or incredibly cheap ($1.67/month flat pricing) on shared hosting.
However, BunnyCDN (recommended) is one reliable, and even cheaper CDN with a data center in Singapore worth mentioning. But this would mean that you have to set up everything by yourself. You get 24h support with SiteLock in conjunction with HostGator hosting, so it’s the easiest option for most users.
Enabling the CDN, the system will automatically pick the location nearest to the website visitor, and serve site contents directly through that country location.
For example, for Asian visitors, it will change access between Singapore, Hong Kong & Japan data center depending on which one is fastest, with the lowest latency. According to SiteLock, this usually improves load times 50% (source).
While the package also offers security features, these are very limited on the basic plan. So I would just focus on the CDN benefits to keep things affordable.
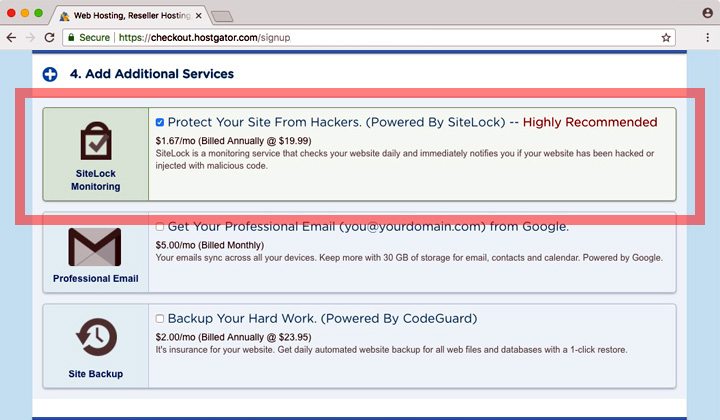
When signing up with HostGator, you’ll see the “SiteLock Monitoring” option available for shared hosting plans, which includes CDN. This is the cheapest way to purchase the service, as it will be $2.09/month if obtained after hosting sign up.
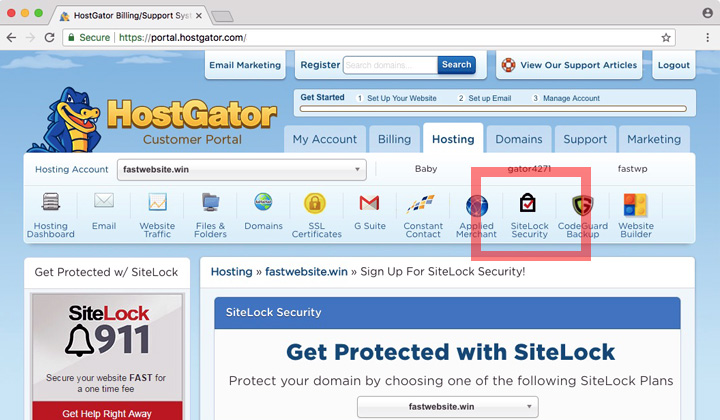
Once in your “Customer Portal”, proceed to “SiteLock Security”.
Go over to the “SiteLock Dashboard” to manage, and start setting up the CDN. Find the small dashboard icon which will take you there.
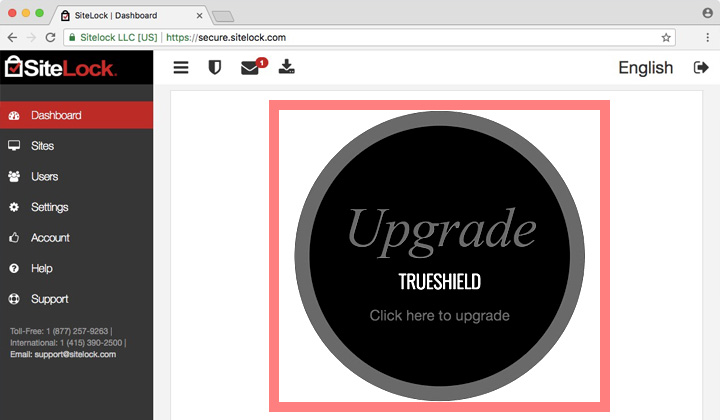
Scroll way down to the bottom of the page, and click on the big “Upgrade TrueShield” button. Optionally, change language from the top menu.
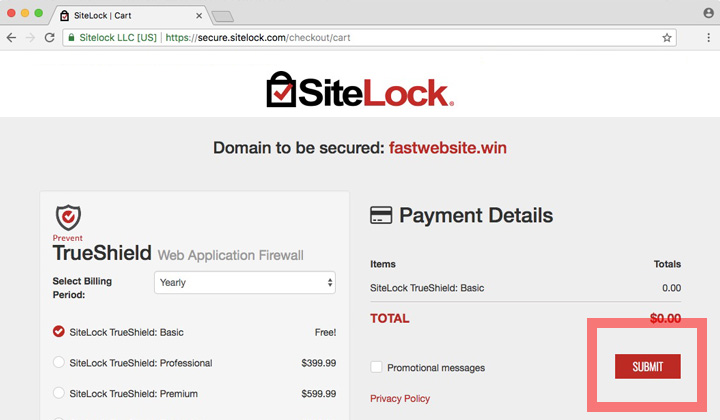
Enable the free basic plan of TrueShield & TrueSpeed CDN, click “Submit”.
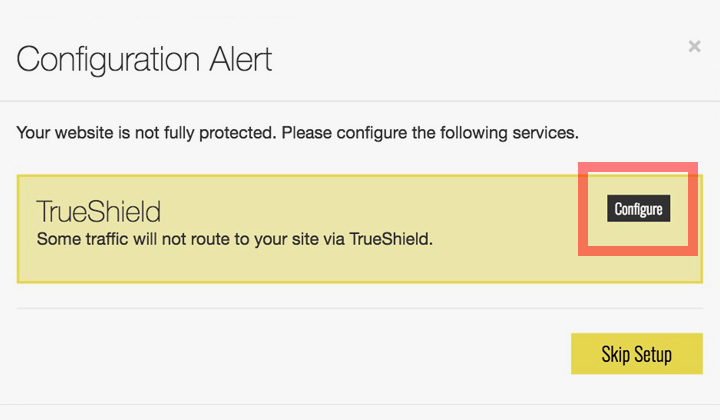
Proceed to “Configure” in your configuration alert pop-up.
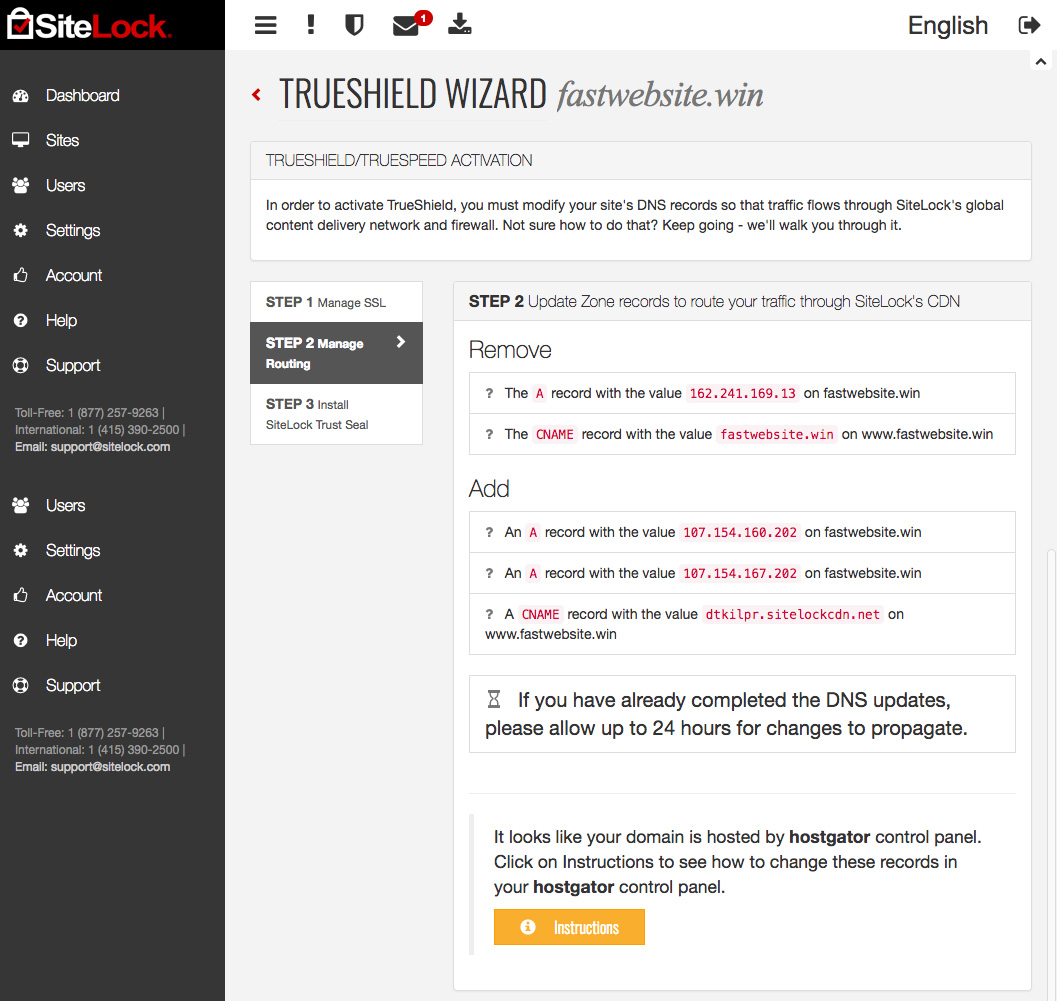
You are presented with instructions under “Manage Routing”.
Where it tells you to add zone records, write down the two “A record” values that are IP addresses and a CNAME value in the form of an URL.
- First “A record” (example; 107.154.160.202)
- Second “A record” (example; 107.154.167.202)
- Third “CNAME record” (example; abcde.sitelockcdn.net)
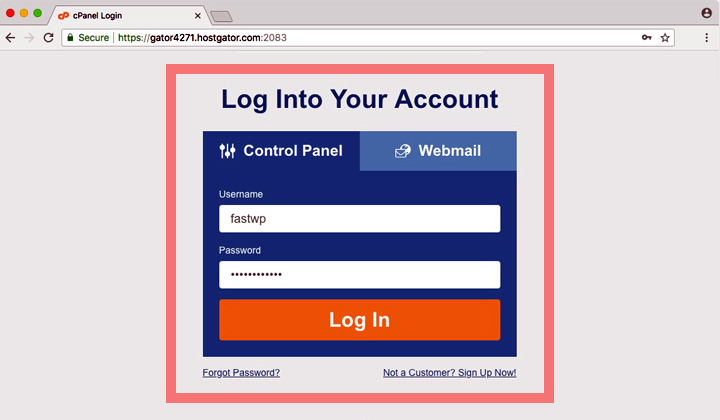
Log in to “Control Panel” or cPanel. Note! Those on optimized WordPress plan have no cPanel, and need to contact support which does the set up.
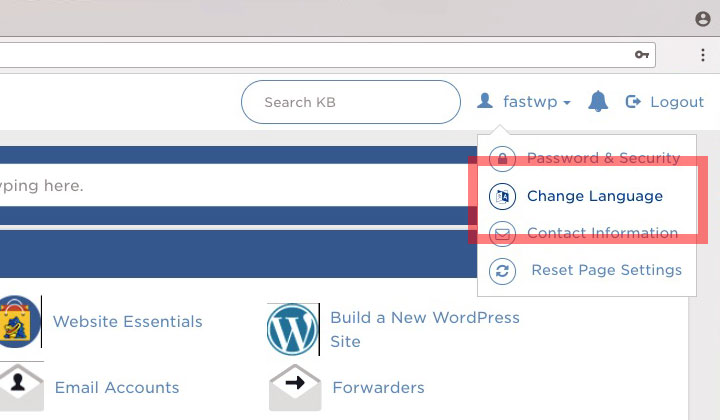
In the top menu, you can change the language to Chinese, Indonesian, etc.
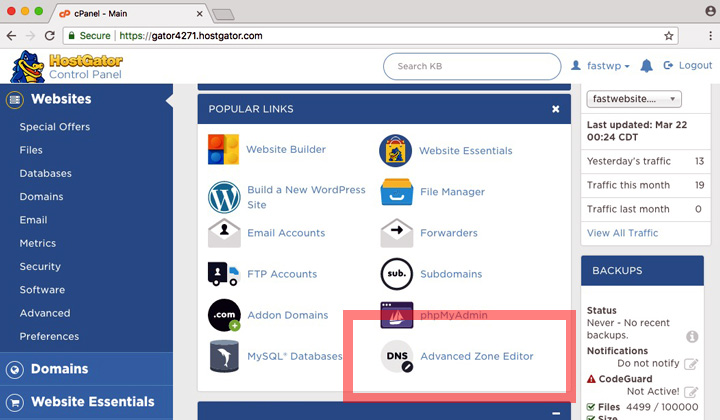
Look for “Advanced Zone Editor” under popular links in cPanel.
Here you can make the necessary record changes to your domain. Does this look too difficult? You can also contact HostGator support and they’ll do it for you.
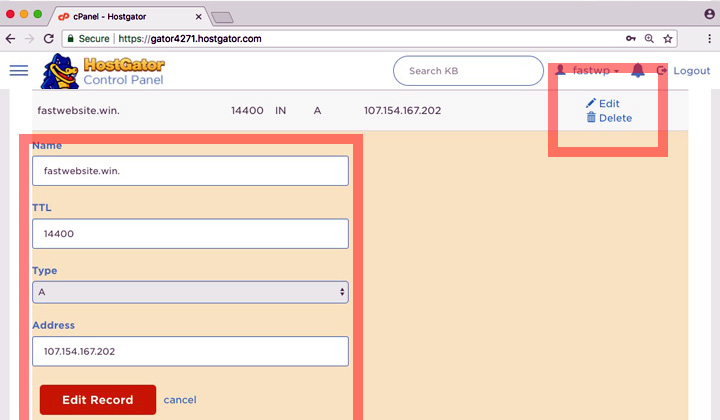
Find the line with the “A record” of your domain name, and choose the “Edit” option as highlighted above. Then fill in the new records;
- Name: fastsingapore.com
- TTL: 14400
- Type: A
- Address: “First A record”
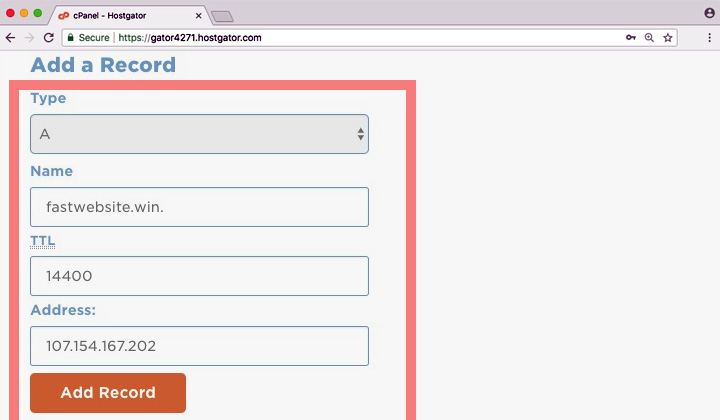
The second “A record” needs to be added. To do this, you’ll find the “Add a Record” menu on top of the same page.
- Type: A
- Name: fastsingapore.com
- TTL: 14400
- Address: “Second A record”
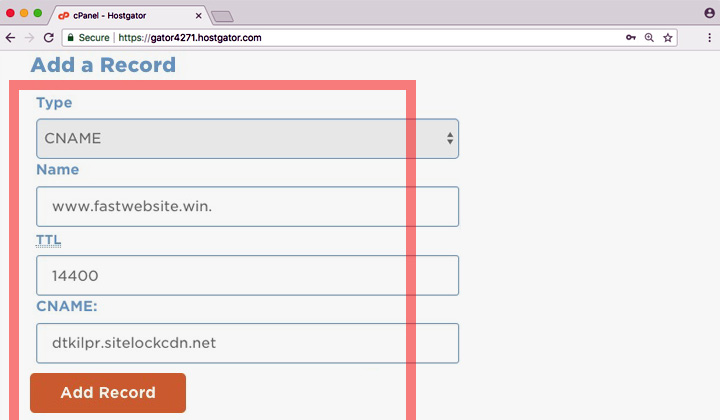
Third & last, add the CNAME record like this;
- Type: CNAME
- Name: www.fastsingapore.com (add the www!)
- TTL: 14400
- CNAME: “Third CNAME record”
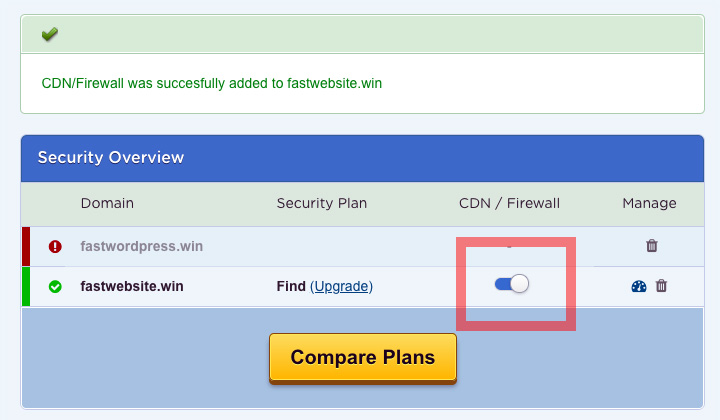
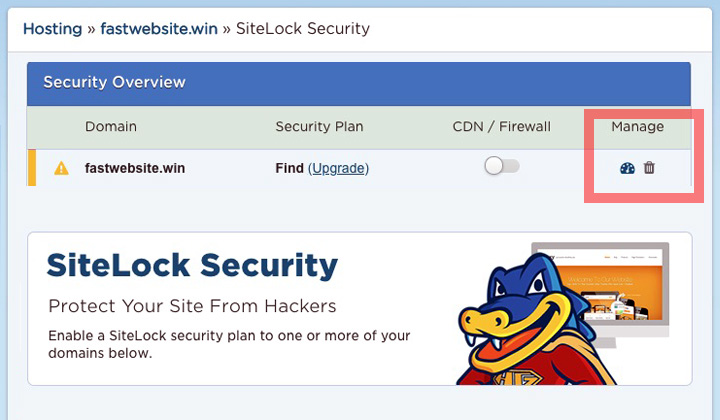
Now your domain is ready to go, and go back to the “SiteLock Security” page in your customer portal. Flip the switch to turn CDN to on!
That’s it! Gradually, over time, your website spreads throughout the global network, including the Singapore data center, and you’ll see speeds increase.
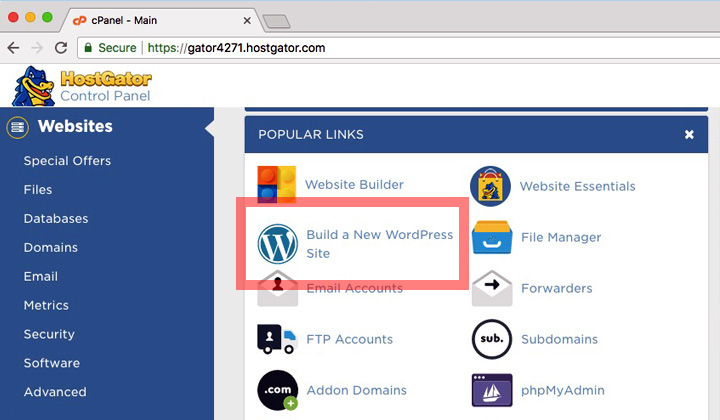
You can proceed to “Build a new WordPress site” to easily get up and running. Or if you already have a website of your own already, which doesn’t have to be WordPress. You can use HostGator’s free site migration to get transferred over.
HTTPS with HostGator CDN
Support for SSL certificates is expensive however, and would require an upgrade to SiteLock’s “Prevent Plan” at $49.99/month, which supports it. For blazing fast HTTPS hosting in Singapore, I would recommend more affordable alternatives. Or just normal HostGator hosting with an SSL certificate, without the CDN.
See this page for the cost of different SiteLock plan levels on HostGator.
Alternatives to HostGator’s Singapore Hosting;
Bluehost — This is actually the same company, and uses the same high-tech data center with HostGator. And, they support free CDN on all hosting plans.
FastComet — To host directly from a Singapore data center, I highly recommend FastComet which is affordable with flat pricing, and offers free CDN and free SSL!
BunnyCDN — And if you are willing to get through the slight learning curve, check out these guys for an affordable alternative to SiteLock’s CDN offered by HostGator.
And that was my review, and guide to Singapore hosting with HostGator.
Thanks for stopping by. Please, comments below.
HostGator supports SiteLock CDN with (not limited to) these data centers;
Canada, Israel, Netherlands (Holland), Germany, United Kingdom (UK), Spain, Italy, Russia, France, Sweden, Austria, Poland, Switzerland, Hong Kong (China), Singapore, Japan, New Zealand, Australia, Brazil, Portugal, Greece & United States (US).
Be advised that no localized Singapore version exists (such as HostGator.sg), and neither HostGator has any actual data center locations in Singapore. Please, use the HostGator.com website, which is their US based site and main hosting HQ.
Also, some of these reviews and other posts have ‘nofolled’ affiliate links in them, when appropriate. This won’t disturb your experience in any way. Thank you for supporting!